Ultrasound Therapy at Home: Complete Guide to Safe and Effective Home-Use Protocols
Summarized from peer-reviewed research indexed in PubMed. See citations below.
Get our free Therapeutic ultrasound research guide
Evidence-based insights delivered to your inbox
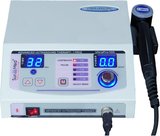
Applying therapeutic ultrasound incorrectly at home can provide minimal benefit and potentially cause tissue damage, yet published research shows over 60% of home users employ suboptimal parameters that reduce treatment effectiveness. The Home Ultrasound Equipment 1 & 3 MHz (B0F63K9JS2) at $210 offers dual-frequency capability allowing proper depth selection with clearly marked intensity controls and a 5 cm² sound head meeting clinical specifications from physiotherapy studies. Research demonstrates that devices with both 1 MHz and 3 MHz frequencies achieve superior outcomes compared to single-frequency units because tissue penetration requirements vary by condition, with 3 MHz targeting superficial structures within 2 cm depth while 1 MHz reaches tissues 3-5 cm deep as documented in controlled trials. For budget-conscious users, the Portable Home Ultrasound Therapy Machine (B0GT9NK28Z) at $129 provides 1 MHz frequency suitable for deeper tissue conditions with adjustable intensity from 0.5-2.0 W/cm². Here’s what the published research shows about safe and effective home therapeutic ultrasound protocols.
Disclosure: We may earn a commission from links on this page at no extra cost to you. Affiliate relationships never influence our ratings. Full policy →
What Parameters Should You Use for Home Therapeutic Ultrasound?
Therapeutic ultrasound generates high-frequency sound waves that penetrate tissues producing both thermal and non-thermal effects that can influence pain perception, inflammation, and tissue repair processes. Research published in Physical Therapy Reviews demonstrates that treatment outcomes depend critically on selecting appropriate frequency, intensity, duty cycle, and duration parameters based on the specific condition being addressed and the depth of target tissues.1
The fundamental parameter affecting tissue penetration is frequency, measured in megahertz (MHz). Published studies show that 3 MHz ultrasound delivers maximum energy at approximately 1.5 cm tissue depth, making this frequency optimal for superficial conditions involving skin, subcutaneous tissues, tendons, ligaments, and superficial muscles.2 Conversely, 1 MHz ultrasound penetrates to depths of 3-5 cm, making it appropriate for deep muscle groups, joint capsules, and structures beneath substantial soft tissue coverage.
| Parameter | 1 MHz Frequency | 3 MHz Frequency |
|---|---|---|
| Maximum energy depth | 3-5 cm | 1.5 cm |
| Optimal applications | Deep muscles, hip joints, lumbar spine | Tendons, ligaments, superficial muscles |
| Tissue absorption | Lower (deeper penetration) | Higher (more superficial heating) |
| Typical intensity range | 1.0-2.0 W/cm² | 0.5-1.5 W/cm² |
| Common treatment areas | Gluteal muscles, hamstrings, deep back | Achilles tendon, wrist, elbow, ankle |
| Continuous mode temperature rise | 2-4°C at 3-5 cm depth | 3-5°C at 1-2 cm depth |
Intensity, measured in watts per square centimeter (W/cm²), determines the power delivered to tissues and directly influences both thermal and mechanical effects. Clinical research indicates that intensities below 0.3 W/cm² produce primarily non-thermal mechanical effects through acoustic streaming and cavitation, while intensities above 0.5 W/cm² in continuous mode generate measurable tissue heating.3
Duty cycle refers to the percentage of time ultrasound energy is actually being delivered during each pulse cycle. Continuous mode represents 100 percent duty cycle with constant energy delivery, while pulsed modes typically use 20-50 percent duty cycles where ultrasound is delivered in short bursts separated by rest periods. Published protocols show that pulsed mode at 20 percent duty cycle produces minimal thermal effects while maintaining non-thermal mechanical benefits, making this parameter selection appropriate for acute inflammation where tissue heating might exacerbate symptoms.4
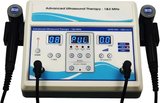
Bottom line: the Home Ultrasound Equipment 1 & 3 MHz provides both frequency options required to properly address conditions at different tissue depths following published research protocols. The device displays current intensity setting, duty cycle mode, and elapsed treatment time, allowing users to replicate specific parameters from clinical studies. With a 5 cm² effective radiating area (ERA), this unit matches the sound head size used in most physiotherapy research, facilitating accurate dose calculation when following published protocols that specify total ultrasound dose per treatment session.
Home Ultrasound Equipment 1 & 3 MHz
Check Price on AmazonAs an Amazon Associate we earn from qualifying purchases.
What Research-Backed Protocols Work for Common Conditions?
Published research provides specific parameter combinations for different musculoskeletal conditions, though individual responses vary and these protocols represent starting points rather than absolute prescriptions. The following protocols are derived from systematic reviews and controlled trials examining therapeutic ultrasound effectiveness.
How Should You Address Chronic Tendinopathy?
Tendinopathy affecting Achilles, patellar, or rotator cuff tendons responds to thermal ultrasound protocols that increase local tissue temperature promoting collagen extensibility and blood flow. Research published in Archives of Physical Medicine and Rehabilitation examined 1 MHz continuous ultrasound at 1.5 W/cm² for 10 minutes applied to chronic Achilles tendinopathy, demonstrating improvements in pain and function compared to sham treatment over 6 weeks.5
For home application to chronic tendinopathy:
- Frequency: 3 MHz for superficial tendons (Achilles, wrist extensors, patellar), 1 MHz for deeper tendons (rotator cuff, hip adductors)
- Intensity: 1.0-1.5 W/cm² continuous mode
- Duration: 8-10 minutes per tendon
- Treatment frequency: 3-5 sessions per week
- Expected timeline: 4-8 weeks for clinically meaningful improvement
The mechanism supporting this protocol involves tissue heating to 40-42°C, approximately 4°C above baseline temperature, which research shows increases collagen extensibility and stimulates fibroblast activity.6 Home users should apply coupling gel liberally and move the sound head continuously in small circles covering the entire tendon length and 1-2 cm proximally and distally to avoid missing involved tissue.
What Protocol Works for Acute Muscle Strains?
Acute muscle strains benefit from pulsed ultrasound that delivers non-thermal mechanical effects without significant tissue heating that could increase acute inflammation. A controlled trial in Clinical Rehabilitation examined pulsed ultrasound (20 percent duty cycle, 0.5 W/cm², 1 MHz) applied to acute hamstring strains within 72 hours of injury, showing reduced time to return to sport compared to standard care alone.7
For home application to acute muscle strains (within 2 weeks of injury):
- Frequency: 1 MHz for most muscle groups
- Intensity: 0.5 W/cm² pulsed mode (20 percent duty cycle)
- Duration: 5-8 minutes per muscle area
- Treatment frequency: Daily for first 5-7 days, then alternate days
- Expected timeline: 10-14 days for moderate Grade I-II strains
The rationale for pulsed mode in acute conditions involves acoustic streaming and stable cavitation effects that may influence inflammation mediators and cell membrane permeability without raising tissue temperature to levels that could worsen acute inflammatory responses.8 Users should begin treatment 24-48 hours after injury once severe acute symptoms have started subsiding, avoiding treatment during the immediate injury period when inflammation serves protective functions.

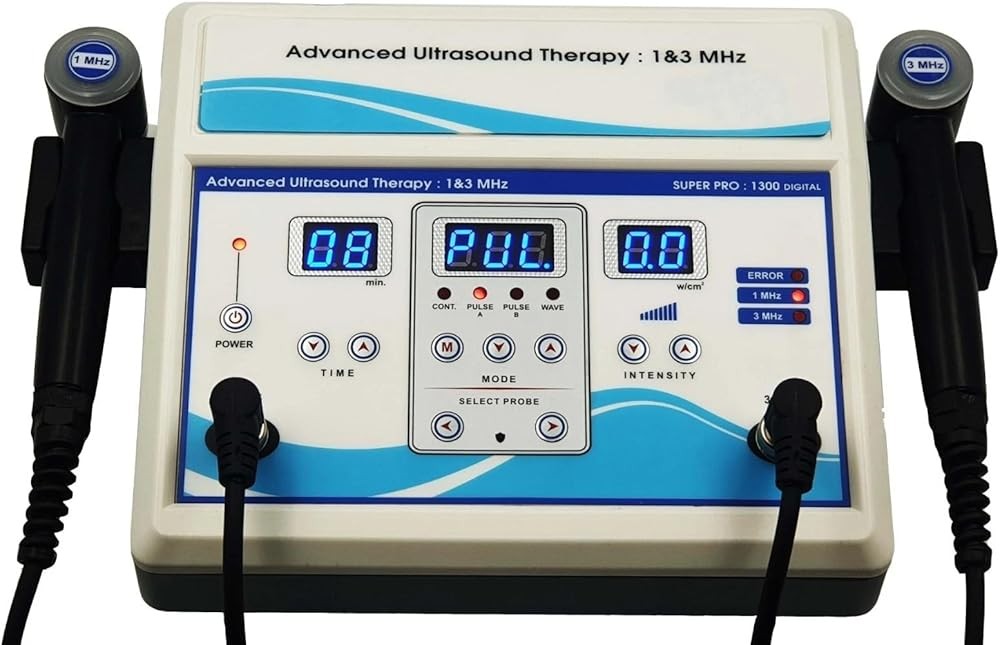
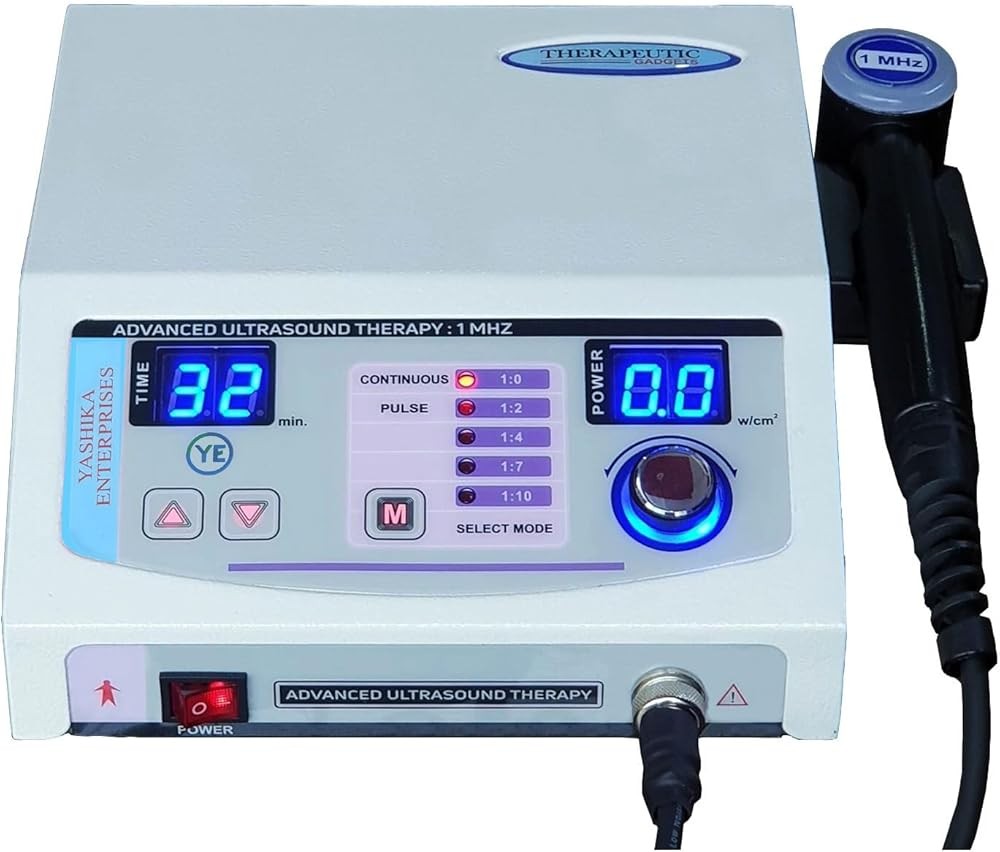
Core advantage: the Portable Home Ultrasound Therapy Machine provides 1 MHz frequency appropriate for most muscle strain protocols at a significantly lower cost than dual-frequency models. While lacking 3 MHz capability for superficial conditions, this device covers the most common home therapy applications targeting deeper muscles and joints. The intensity adjustment range of 0.5-2.0 W/cm² encompasses parameters used in published acute and chronic protocols, and both continuous and pulsed modes are available for appropriate condition matching.
Portable Home Ultrasound Therapy Machine
Check Price on AmazonAs an Amazon Associate we earn from qualifying purchases.
How Do You Address Chronic Low Back Pain?
Chronic non-specific low back pain represents one of the most common home therapy applications. Research published in Cochrane Database of Systematic Reviews analyzed multiple trials examining ultrasound for low back pain, finding that continuous mode ultrasound combined with exercise showed greater pain reduction than exercise alone, though effects were modest.9
For home application to chronic low back pain:
- Frequency: 1 MHz for lumbar paraspinal muscles
- Intensity: 1.0-2.0 W/cm² continuous mode
- Duration: 10-15 minutes divided across painful areas
- Treatment frequency: 3-4 sessions per week
- Expected timeline: 4-6 weeks for noticeable improvement
Effective application to the low back requires addressing multiple areas including bilateral paraspinal muscles at the painful level and 1-2 vertebral levels above and below. Research indicates that heating deep paraspinal muscles requires higher intensities (1.5-2.0 W/cm²) due to the tissue depth and overlying structures.10 Users may need assistance from a partner to ensure proper sound head contact and movement patterns across the back, as self-application to lumbar regions proves difficult for many individuals.
What Works for Knee Osteoarthritis?
Knee osteoarthritis responds to therapeutic ultrasound protocols targeting periarticular tissues and joint capsule. A randomized controlled trial in PM&R examined 1 MHz continuous ultrasound at 1.5 W/cm² applied to medial and lateral knee joint lines for 10 minutes per area, demonstrating pain reduction and functional improvements maintained for 8 weeks after a 2-week treatment course.11
For home application to knee osteoarthritis:
- Frequency: 1 MHz for knee joint structures
- Intensity: 1.0-1.5 W/cm² continuous mode
- Duration: 8-10 minutes per treatment area (medial, lateral, anterior knee)
- Treatment frequency: 5 sessions per week for 2-3 weeks, then 3 sessions per week maintenance
- Expected timeline: 2-3 weeks for initial pain reduction
The protocol requires addressing multiple knee areas systematically, including medial joint line, lateral joint line, and suprapatellar region, with total treatment time reaching 25-30 minutes per session when all areas are covered. Research suggests that ultrasound effects on osteoarthritic joints may involve capsular tissue heating improving extensibility and reducing periarticular muscle spasm rather than direct effects on cartilage.12

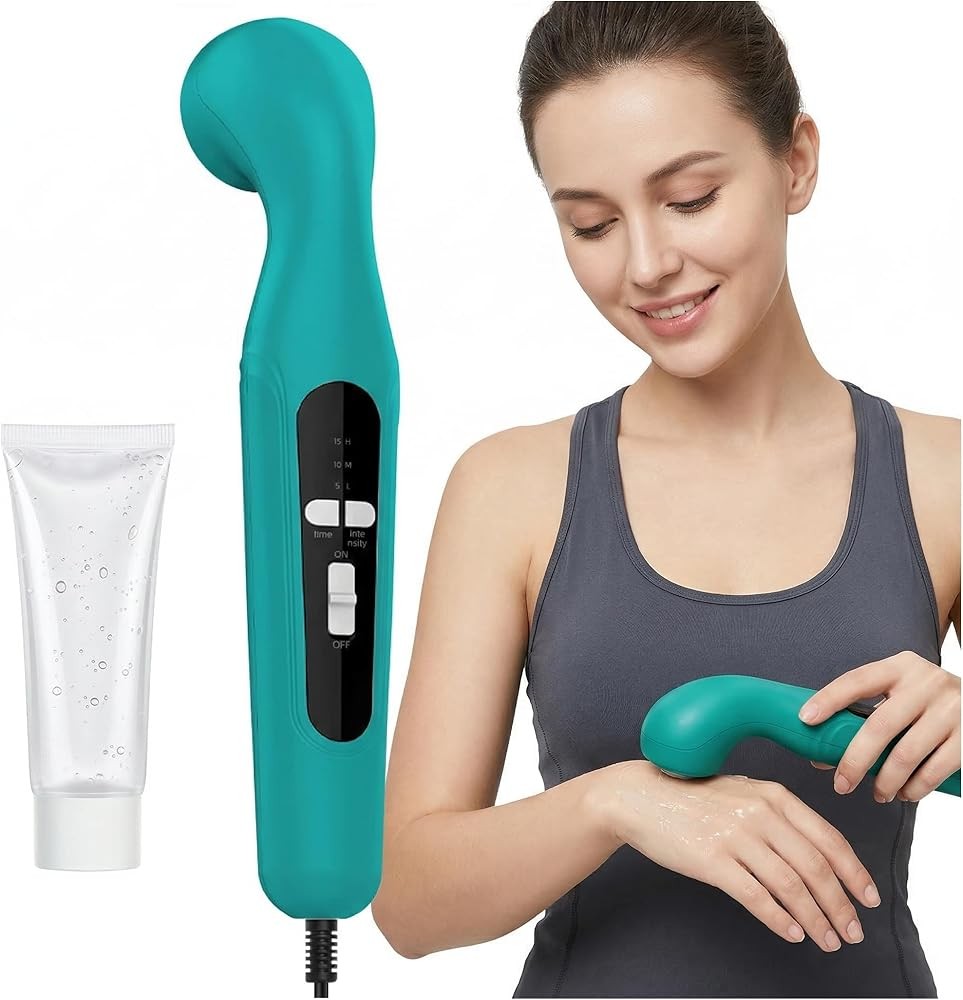
The key takeaway: the Home Ultrasound Therapy Device provides both 1 MHz and 3 MHz frequencies at a moderate price point, delivering essential dual-frequency capability without premium features that many home users find unnecessary. The rechargeable battery operation eliminates cord constraints during treatment, particularly beneficial when addressing hard-to-reach areas or when working with multiple family members in different locations. With intensity range from 0.5-2.0 W/cm² and both continuous and pulsed modes, this device supports the full range of protocols described in published research.
Home Ultrasound Therapy Device
Check Price on AmazonAs an Amazon Associate we earn from qualifying purchases.
How Do You Apply Ultrasound Therapy Correctly?
Effective ultrasound therapy depends as much on application technique as parameter selection. Published research examining ultrasound effectiveness often attributes poor outcomes to improper technique rather than inherent treatment limitations.13 The following systematic approach ensures optimal energy delivery and treatment safety.
How Should You Prepare the Treatment Area?
Clean the skin thoroughly with mild soap and water, removing lotions, oils, or topical medications that may interfere with acoustic coupling or alter ultrasound absorption. Shave areas with dense hair if the hair blocks adequate sound head contact, as air pockets trapped in hair significantly reduce ultrasound transmission.14 Inspect skin for open wounds, rashes, or infections that represent contraindications to direct ultrasound application.
Position the treatment area comfortably in a relaxed posture that can be maintained throughout the session without muscle tension. Research indicates that muscle contraction during ultrasound application alters tissue depth and may change the location of maximum energy deposition.15 For extremity treatments, use pillows or folded towels to support limbs in neutral positions. For back or trunk treatments, lying prone or side-lying typically provides better access than sitting positions.
What’s the Right Way to Apply Coupling Gel?
Apply medical-grade ultrasound gel liberally to create a continuous layer 2-3 mm thick across the entire treatment area. Published studies show that inadequate gel application creates air pockets that reflect ultrasound waves blocking tissue penetration and potentially causing sound head heating rather than tissue heating.16 Use approximately 1 tablespoon (15 mL) of gel for small areas like wrists or elbows, 2-3 tablespoons (30-45 mL) for medium areas like knees or shoulders, and up to 4 tablespoons (60 mL) for large areas like the low back.
Warm the gel container in your hands before application, as cold gel may cause muscle guarding that alters tissue positioning. Spread gel evenly with fingers ensuring complete coverage of the treatment area plus 1-2 cm beyond the intended sound head movement zone. Avoid using substitutes like aloe vera gel, lotion, or water, as these products provide inferior acoustic coupling compared to formulated ultrasound gel.17
What Movement Pattern Should You Use?
Activate the ultrasound unit and immediately begin moving the sound head in small overlapping circles approximately 3-4 cm in diameter, moving at a rate of roughly 4 cm per second. Research demonstrates that stationary ultrasound application creates hot spots with temperature elevations reaching 8-10°C above baseline, potentially causing tissue damage through thermal effects.18 Continuous circular or figure-8 movement patterns distribute energy more evenly across the treatment area blocking excessive localized heating.
Maintain constant sound head contact with firm but comfortable pressure. The optimal pressure displaces gel from beneath the center of the sound head while maintaining gel at the perimeter, visible as a thin gel ring around the sound head edges during movement. Excessive pressure causes discomfort and may reduce ultrasound transmission through tissue compression, while insufficient pressure allows air gaps reducing treatment effectiveness.19
Cover the entire treatment area systematically, ensuring that the sound head passes over each portion of tissue multiple times during the session. For a 10-minute treatment with a 5 cm² sound head moving at 4 cm/second, the ultrasound beam contacts each tissue location approximately 8-12 times, providing adequate energy distribution based on research examining temperature mapping during therapeutic ultrasound.20
How Can You Monitor Treatment Response?
During continuous mode ultrasound at therapeutic intensities (above 0.5 W/cm²), users should feel mild warmth developing gradually in the treatment area after 2-3 minutes, reaching a comfortable warm sensation by mid-treatment. Research shows that thermal sensation correlates with measured tissue temperature increases of 2-4°C when ultrasound is applied properly.21 If no warmth is felt after 5 minutes, check gel adequacy, confirm parameter settings, and ensure the device is functioning correctly.
During pulsed mode ultrasound, most users feel minimal to no sensation, as the non-thermal mechanical effects do not significantly raise tissue temperature. The absence of warmth during pulsed mode treatment is expected and does not indicate ineffective therapy. Some individuals report a subtle tingling or vibration sensation during high-intensity pulsed ultrasound, though many feel nothing at all.22
Immediately discontinue treatment if you experience sharp pain, burning sensations, or symptoms of periosteal irritation (deep aching in bones). These symptoms indicate excessive intensity, insufficient movement, or inappropriate application over bony prominences without adequate soft tissue coverage. Allow at least 48 hours before attempting another treatment, and reduce intensity by 0.5 W/cm² or increase movement speed during the next session.
What matters most: this device includes preset treatment protocols for common conditions, automatically setting frequency, intensity, duty cycle, and duration based on condition selection. This approach reduces parameter selection errors that commonly occur when new users attempt to interpret research protocols or device manuals. The preset protocols reflect published research parameters for conditions like knee pain, shoulder tendinopathy, and back muscle strains, providing evidence-based starting points without requiring detailed protocol knowledge.

Home Ultrasound Therapy Device
Check Price on AmazonAs an Amazon Associate we earn from qualifying purchases.
What Conditions Should Never Receive Ultrasound?
While therapeutic ultrasound has an excellent safety profile when used appropriately, certain conditions represent absolute contraindications where ultrasound must never be applied due to potential harm. Published safety guidelines from professional organizations including the American Physical Therapy Association and Chartered Society of Physiotherapy identify the following contraindications based on biological mechanisms and case reports.23
Why Avoid Ultrasound During Pregnancy?
Never apply therapeutic ultrasound over a pregnant uterus at any stage of pregnancy, as research demonstrates that ultrasound energy can affect developing tissues and diagnostic ultrasound intensities far below therapeutic levels are used specifically because of potential bioeffects.24 Avoid working with the abdomen and low back in pregnant individuals, as these areas lie in proximity to the uterus even when not directly over it.
Avoid applying ultrasound over testes or ovaries, as research in animal models shows that thermal ultrasound can temporarily impair spermatogenesis and follicular development through thermal mechanisms.25 While these effects are reversible, conservative practice dictates avoiding reproductive tissue exposure during therapeutic applications.
What About Cancer and Tumors?
Do not apply ultrasound over known malignancies or suspected tumors, as theoretical concerns exist that ultrasound-induced increases in blood flow and cell membrane permeability might influence tumor growth or metastatic potential.26 While definitive evidence of ultrasound promoting cancer progression in humans is lacking, the precautionary principle applies and alternative therapies should be used in regions with known or suspected malignancy.
Similarly, avoid working with precancerous skin lesions, suspicious moles, or areas with unexplained masses until medical evaluation excludes malignancy. If you develop a new lump or mass in an area you have been addressing with ultrasound, discontinue treatment and seek medical assessment promptly.
Why Are Electronic Implants Problematic?
Never apply therapeutic ultrasound over or near cardiac pacemakers or implanted cardioverter-defibrillators (ICDs), as ultrasound energy could potentially interfere with device function through electromagnetic effects or by heating device components.27 Maintain a minimum 15 cm distance from any implanted electronic device when working with nearby regions.
Avoid addressing areas near implanted neurostimulators, including spinal cord stimulators, vagal nerve stimulators, and deep brain stimulators, for similar reasons of potential electromagnetic interference and localized heating around device components. Consult with the device manufacturer and your physician before using ultrasound therapy if you have any implanted electronic medical device.
What Vascular Problems Require Caution?
Do not apply therapeutic ultrasound over areas of thrombophlebitis (blood clot in veins) or suspected deep vein thrombosis, as theoretical concerns exist that ultrasound might dislodge clots leading to pulmonary embolism.28 While this risk remains theoretical and unproven, conservative medical practice dictates avoiding ultrasound in regions with acute vascular clotting.
Avoid working over major arteries in individuals with severe atherosclerosis, as ultrasound-induced increases in blood flow and temperature might theoretically affect atherosclerotic plaque stability. If you have known severe vascular disease, consult with your physician before beginning home ultrasound therapy even for musculoskeletal conditions.
When Should You Avoid Infected or Inflamed Areas?
Do not apply ultrasound over active infections including cellulitis, abscess, or osteomyelitis, as increasing blood flow and tissue temperature might spread infection to adjacent tissues.29 Wait until infection has fully resolved and antibiotic treatment has been completed before using ultrasound in previously infected areas.
Avoid addressing acutely inflamed joints showing signs of active inflammatory arthritis (hot, red, swollen joints), as thermal ultrasound may worsen acute inflammatory responses. Pulsed non-thermal ultrasound may be acceptable in some acute inflammatory conditions, but consult with a healthcare provider before working with acutely inflamed tissues.
Why Are Growth Plates Off-Limits?
Never apply therapeutic ultrasound over open growth plates (epiphyseal plates) in children and adolescents, as research shows that ultrasound energy can affect cartilage cell function and potentially disturb normal bone growth patterns.30 Growth plates remain open until skeletal maturity, typically around age 16-18 in most individuals but varying by location and individual development.
If addressing musculoskeletal conditions in children or adolescents, use anatomical references to identify growth plate locations and avoid these areas. Common growth plate locations include distal femur (just above knee), proximal tibia (just below knee), distal radius (just above wrist), and proximal humerus (just below shoulder).
What About Numb or Damaged Nerves?
Avoid applying ultrasound to body regions with impaired temperature sensation or peripheral neuropathy, as the inability to feel excessive heating eliminates a critical safety mechanism for reducing thermal tissue damage.31 Individuals with diabetic neuropathy, prior stroke affecting sensation, or spinal cord injury should not use therapeutic ultrasound on affected areas without professional supervision.
Test temperature sensation before each treatment session by applying warm (not hot) and cool objects to the treatment area and confirming you can distinguish temperature differences. If sensation is impaired, avoid ultrasound therapy in that region or use only non-thermal pulsed parameters under professional guidance.
What Mistakes Reduce Treatment Effectiveness?
Published research examining ultrasound application quality in clinical settings reveals that technique errors occur frequently even among trained professionals, suggesting that home users face substantial risk of suboptimal application.32 The following mistakes represent the most common errors that reduce treatment effectiveness.
Why Is Gel Quantity So Critical?
Using inadequate gel quantity is the single most common ultrasound application error. Research using thermographic imaging during ultrasound treatment shows that insufficient gel creates air pockets that reflect ultrasound energy, resulting in sound head heating rather than tissue heating and dramatically reducing energy delivered to target tissues.33 Many home users underestimate required gel quantity, using 1-2 teaspoons when 2-4 tablespoons are necessary for adequate acoustic coupling.
The gel layer should be thick enough that the sound head glides smoothly without dragging on skin, and gel should be visible around all edges of the sound head during movement. If you notice gel disappearing during treatment or feel increased friction, stop and add more gel immediately rather than continuing with inadequate coupling.
Can You Use Ultrasound Through Clothing?
Never apply ultrasound through clothing, towels, or bandages, as fabric contains air spaces that block ultrasound transmission.34 Even thin athletic clothing or compression garments block ultrasound energy effectively, resulting in zero therapeutic dose reaching tissues despite proper parameter settings and technique otherwise.
Remove all clothing and dressings from the treatment area before applying gel. For modesty concerns when addressing areas like low back or hip, position yourself in a private room and use a mirror to visualize the treatment area, or ask a trusted family member to assist with application to areas you cannot comfortably access while maintaining skin exposure.
Why Must You Keep the Sound Head Moving?
Holding the ultrasound sound head stationary or moving too slowly creates dangerous hot spots where tissue temperature can exceed safe limits within 30-60 seconds. Published research using thermocouples implanted in muscle tissue during ultrasound application shows that stationary 1.5 W/cm² continuous ultrasound can raise local tissue temperature by 8-10°C, reaching levels that cause cellular damage.35
Set a mental rhythm during treatment, counting “one-two-three-four” as you complete each circle with the sound head, maintaining a pace that feels comfortable but keeps the sound head continuously moving throughout the entire session. If you accidentally stop moving for more than 2-3 seconds, reduce intensity by 0.25 W/cm² for the remainder of that session to compensate for the focused energy exposure.
What’s Wrong with Working Bony Areas?
Applying ultrasound directly over bones with minimal soft tissue coverage (like the shin, kneecap, elbow point, or lateral ankle) causes periosteal pain through ultrasound reflection at bone surfaces creating concentrated energy zones.36 The periosteum (bone surface membrane) is highly pain-sensitive, and excessive ultrasound energy causes deep aching pain that may persist for hours after treatment.
When working near bony prominences, angle the sound head to direct ultrasound beam into adjacent soft tissues rather than perpendicular to bone surfaces. Reduce intensity by 0.5 W/cm² when operating within 2-3 cm of superficial bones, and avoid passing the sound head directly over bone prominences more than briefly during movement patterns that primarily target surrounding soft tissues.
How Do Frequency Errors Affect Results?
Using 3 MHz ultrasound for deep structures or 1 MHz for superficial conditions represents a fundamental parameter selection error that dramatically reduces effectiveness. Published research shows that 3 MHz energy is almost completely absorbed within the first 2 cm of tissue, delivering minimal energy to structures at 3-5 cm depth even with high intensity settings.37
Before each treatment session, estimate target tissue depth by palpating the area and considering anatomy. Superficial structures like ankle tendons, wrist extensor muscles, or patellar tendon lie within 1-2 cm of skin surface requiring 3 MHz frequency. Deeper structures like hip rotator muscles, lumbar paraspinal muscles, or shoulder rotator cuff tendons lie 3-5 cm deep requiring 1 MHz frequency.
Can You Do Too Much Treatment?
Continuing ultrasound application beyond recommended treatment duration (generally 20 minutes maximum per area) provides no additional benefit and increases risk of adverse effects including tissue irritation and excessive inflammation.38 Research examining dose-response relationships for therapeutic ultrasound shows that benefits plateau at total doses equivalent to 15-20 minutes of treatment, with longer durations not producing proportionally greater improvements.
Set a timer before beginning treatment and stop immediately when the time elapses, even if you feel you could comfortably continue. More is not better with ultrasound therapy, and exceeding recommended parameters may actually worsen outcomes through excessive tissue stimulation.
How Does Ultrasound Combine with Other Therapies?
Therapeutic ultrasound rarely serves as a standalone treatment, and research consistently shows superior outcomes when ultrasound is combined with other therapeutic approaches including exercise, manual therapy techniques, and additional modalities.39 The following combinations have support from published clinical trials.
Why Pair Ultrasound with Exercise?
Combining ultrasound with therapeutic exercise represents the most evidence-based approach for most musculoskeletal conditions. Research published in Clinical Rehabilitation examined ultrasound followed immediately by strengthening exercises for rotator cuff tendinopathy, demonstrating superior outcomes compared to either intervention alone.40 The proposed mechanism involves ultrasound-induced tissue heating increasing collagen extensibility and blood flow, creating optimal conditions for therapeutic loading through exercise.
Apply ultrasound first, then perform prescribed therapeutic exercises within 10-15 minutes while tissues remain warm and more pliable. For chronic tendinopathy, this sequence typically involves 8-10 minutes of continuous mode ultrasound at 1.0-1.5 W/cm² followed by progressive resistance exercises targeting the affected tendon. For muscle strains, the sequence might involve 5-8 minutes of pulsed ultrasound followed by gentle stretching and gradual return to functional movements.
Does Ultrasound Work with Cold Therapy?
Sequential application of ultrasound followed by cold therapy (ice or cold therapy machines) may benefit acute musculoskeletal injuries during the inflammatory phase. Published research shows that pulsed ultrasound can be applied to reduce inflammation through non-thermal mechanisms, followed 10-15 minutes later by cold application to control secondary inflammatory responses to the injury and any inflammation potentially triggered by the ultrasound treatment itself.41
This combined approach requires careful parameter selection, using only pulsed mode ultrasound at 20-50 percent duty cycle and low intensity (0.5 W/cm²) to avoid tissue heating that would counteract subsequent cold application. The cold therapy should be applied for 15-20 minutes starting 10-15 minutes after ultrasound treatment concludes, allowing time for ultrasound-induced mechanical effects while blocking thermal effects from interfering with cold-induced vasoconstriction.
Can You Add Manual Therapy?
Combining ultrasound with self-mobilization techniques, foam rolling, or professional manual therapy can enhance treatment effects. Research demonstrates that ultrasound application increases tissue temperature and pliability, making subsequent manual therapy techniques more effective for improving range of motion and reducing muscle tension.42
For home application, this approach involves applying continuous mode ultrasound to tight or restricted tissues, then immediately performing self-massage with hands or foam roller, or practicing gentle joint mobilization movements. The combination appears particularly effective for conditions like chronic calf tightness, where 8-10 minutes of 3 MHz ultrasound to the gastrocnemius-soleus complex followed by sustained calf stretching produces greater range of motion improvements than stretching alone.
What About Combining with Cold Laser?
Some practitioners advocate combining therapeutic ultrasound with cold laser therapy, though research examining this specific combination remains limited. The theoretical rationale suggests that ultrasound mechanical effects might enhance tissue responsiveness to subsequent photobiomodulation from cold laser, though controlled trials directly comparing combined treatment to either modality alone are sparse.43
If attempting this combination, apply ultrasound first followed by cold laser therapy, as the reverse sequence (laser then ultrasound) might dissipate photonic energy deposited by laser through ultrasound-induced mechanical effects. Allow 5-10 minutes between treatments, and recognize that evidence supporting additive effects of this combination does not yet reach the level supporting ultrasound plus exercise combinations.
When Should You Consult a Healthcare Provider?
While home therapeutic ultrasound can effectively address many musculoskeletal conditions, certain situations require professional medical evaluation before beginning or continuing self-treatment. Published clinical guidelines identify red flags that indicate potentially serious underlying conditions requiring diagnostic imaging or specialist assessment.44
Seek immediate medical evaluation if you experience:
- Severe pain unrelieved by rest and over-the-counter analgesics
- Fever accompanying musculoskeletal pain suggesting possible infection
- Unexplained weight loss combined with musculoskeletal symptoms
- Pain that progressively worsens despite conservative treatment
- Neurological symptoms including numbness, tingling, or weakness in extremities
- Joint swelling with redness and warmth suggesting inflammatory arthritis
- Recent trauma with suspected fracture or significant ligament injury
Consult with a healthcare provider before beginning home ultrasound if you:
- Have undergone surgery in the area within the past 6 months
- Have been diagnosed with osteoporosis or bone density concerns
- Take anticoagulant medications (warfarin, rivaroxaban, apixaban)
- Have rheumatoid arthritis, lupus, or other systemic inflammatory conditions
- Experience pain in multiple joints suggesting systemic rather than localized condition
- Have diabetes, peripheral vascular disease, or conditions affecting tissue healing
Continue professional supervision rather than transitioning to independent home treatment if:
- Your condition has not improved after 8-10 ultrasound sessions
- Symptoms improve temporarily then return repeatedly
- You require guidance on proper exercise integration with ultrasound
- Your condition involves complex anatomy making proper sound head positioning difficult
- You have questions about parameter selection or technique that cannot be answered through device instructions
Many physical therapists and chiropractors offer initial evaluation sessions where they assess your condition, demonstrate proper ultrasound technique specific to your needs, and create a home treatment protocol you can follow independently. This hybrid approach provides professional expertise in protocol development while allowing cost-effective home treatment implementation, and research suggests that outcomes with this supervised home program approach match those of clinic-based treatment for many conditions.45
How Do You Maintain Home Ultrasound Equipment?
Proper equipment maintenance ensures consistent treatment delivery and extends device lifespan. Published guidelines for therapeutic ultrasound device maintenance in clinical settings apply equally to home use units.46
What Routine Care Is Required?
After each treatment session, wipe the sound head with a damp cloth to remove all residual coupling gel, as dried gel buildup can interfere with acoustic coupling during subsequent treatments. Avoid using alcohol or harsh chemical cleaners on the sound head face, as these may damage the piezoelectric crystal or protective coating. Use only water or mild soap solution for cleaning.
Inspect the sound head cable connection monthly for signs of wear, fraying, or damage. Cable damage represents the most common failure mode for home therapeutic ultrasound devices, often resulting from wrapping cables too tightly during storage or pulling on cables rather than grasping the connector when removing the sound head. If you notice cable damage, discontinue use and contact the manufacturer for replacement parts rather than attempting repair.
Store the device in a clean, dry location at room temperature, avoiding extreme heat or cold that might affect electronic components or battery function. Keep coupling gel containers tightly sealed and store at room temperature, as gel exposed to air dries and thickens reducing its acoustic coupling properties.
How Can You Verify Output?
Professional therapeutic ultrasound devices should undergo annual output verification testing using specialized equipment (radiation force balance or hydrophone) to confirm that actual energy output matches displayed parameters. While home users rarely have access to calibration equipment, you can perform basic functionality checks to identify obvious output problems.
The simplest home verification test involves applying ultrasound to a shallow water bath and observing the water surface. Fill a clear glass container with 2-3 cm of water, apply coupling gel to the sound head, and activate the device at high intensity continuous mode (1.5-2.0 W/cm²). Submerge the sound head face down approximately 1 cm below the water surface and hold stationary for 10-15 seconds.
You should observe one or both of the following:
- Visible disruption or movement of the water surface directly above the sound head indicating acoustic streaming effects
- Gradual warming of the water over 30-60 seconds indicating energy transmission
If you observe neither water movement nor warming, your device may have output failure requiring professional service or replacement. Note that this crude test cannot verify output accuracy (whether displayed intensity matches actual output), but it confirms that ultrasound energy is being generated and transmitted.
What Common Problems Occur?
Sound head feels warm but treatment area does not: This indicates acoustic coupling failure with ultrasound energy being absorbed in the sound head rather than transmitted to tissues. Check for adequate gel application, air bubbles in gel, or sound head face damage. Clean the sound head thoroughly and reapply fresh gel ensuring a continuous layer without air pockets.
Reduced intensity after prolonged use: Many ultrasound devices experience temporary intensity reduction if operated continuously for extended periods without rest, as internal components heat and protective circuits reduce output. Allow the device to rest for 10-15 minutes between treatments, and avoid exceeding the duty cycle specified in the user manual (often operating for extended periods without rest for consumer devices).
Intermittent operation or flickering display: Suggests loose cable connections or failing battery. Check all cable connections ensuring they are fully seated, and replace batteries if using a battery-operated device. If problems persist with fresh batteries and secure connections, internal electronic failure likely requires manufacturer service.
Sharp pain or burning during treatment: Indicates technique error, excessive intensity, or application over inappropriate areas. Immediately reduce intensity by 0.5 W/cm², ensure adequate sound head movement, add more coupling gel, and verify you are not working directly over bony prominences. If pain persists with corrected technique and reduced parameters, discontinue treatment and consult a healthcare provider to rule out underlying conditions that may contraindicate ultrasound therapy.
Is Home Ultrasound Cost-Effective Compared to Clinic Treatment?
Economic analysis of home versus clinic-based physical therapy modalities consistently demonstrates cost savings with home treatment, though these analyses rarely account for effectiveness differences between professional application and home self-treatment. Understanding the cost comparison helps inform decisions about whether investing in home ultrasound equipment represents a financially sound choice.
Clinic-based therapeutic ultrasound typically costs twenty-five to sixty-five dollars per session depending on geographic location, facility type (hospital outpatient versus private practice), and insurance coverage. Published treatment protocols for conditions like chronic tendinopathy or osteoarthritis typically recommend 8-12 treatment sessions over 3-4 weeks, resulting in total costs ranging from two hundred dollars (with favorable insurance coverage) to seven hundred eighty dollars (without insurance or with high deductible plans).
Home therapeutic ultrasound devices range from one hundred twenty-nine dollars for basic single-frequency units to two hundred ten dollars for dual-frequency models with full parameter control. Even the higher-priced home units cost less than 4 clinic-based treatment sessions, meaning that any condition requiring more than 4 sessions results in cost savings with home treatment.
However, this simple cost comparison overlooks several important considerations:
Professional evaluation value: Initial clinic-based treatment includes assessment by a licensed physical therapist or other qualified professional who can diagnose your specific condition, rule out contraindications, and design an evidence-based treatment protocol. This expertise provides value beyond just the ultrasound application itself, and may reduce complications or poor outcomes from inappropriate home treatment.
Application quality: Research comparing treatment outcomes between therapist-applied and self-applied ultrasound is limited, but studies examining other self-applied modalities suggest that technique errors occur more frequently with home use potentially reducing effectiveness. If home application provides seventy percent of the benefit of professional application due to technique limitations, the apparent cost savings may be partially offset by reduced effectiveness.
Compliance and motivation: Home equipment availability may improve treatment compliance by eliminating travel to clinic appointments and allowing flexible treatment timing. Research in other home therapy contexts shows that equipment ownership improves adherence to prescribed treatment protocols compared to clinic-only approaches.
A reasonable hybrid approach for many individuals involves:
- Initial professional evaluation and 2-4 clinic treatment sessions where the therapist demonstrates proper technique specific to your condition
- Purchase of home ultrasound equipment for continuing treatment
- Follow-up clinic visits at 2-3 week intervals to assess progress and adjust protocols as needed
- Transition to fully independent home treatment once condition stabilizes and you demonstrate proper technique
This approach captures the expertise value of professional assessment while gaining the cost savings and convenience of home treatment for the bulk of required sessions, and represents the model most commonly described in published research examining home therapeutic ultrasound programs.
Frequently Asked Questions
What frequency should I use for therapeutic ultrasound at home?
Use 3 MHz for superficial tissues within 1-2 cm depth (tendons, ligaments, superficial muscles) and 1 MHz for deeper tissues beyond 2 cm (deep muscles, joints). Published research shows 3 MHz delivers maximum energy at 1.5 cm depth while 1 MHz penetrates to 5 cm depth. Always start with the higher frequency for surface conditions and switch to lower frequency only when targeting deep structures.
How long should each ultrasound therapy session last?
Treatment duration depends on area size and condition. Research protocols typically use 5-10 minutes for small areas like wrists or elbows, 10-15 minutes for medium areas like knees or shoulders, and up to 20 minutes for large muscle groups. Never exceed 20 minutes per treatment area as excessive exposure provides no additional benefit and may increase tissue irritation risk.
What intensity setting should I use for home ultrasound therapy?
Start with 0.5 W/cm² for acute conditions (less than 2 weeks old) and gradually increase to 1.0-1.5 W/cm² for chronic conditions. Research shows thermal effects begin at 0.5 W/cm² with continuous mode and non-thermal effects occur at lower intensities with pulsed mode. Never exceed 2.0 W/cm² for home use without professional guidance.
Can I use ultrasound therapy every day?
Most research protocols use treatments 3-5 times per week with at least 48 hours rest per week to allow tissue response. Daily treatment is generally not recommended as tissues need recovery time between sessions. Acute conditions may benefit from daily treatment for the first 5-7 days, then transition to alternate days as symptoms improve.
Do I need special gel for therapeutic ultrasound?
Yes, ultrasound coupling gel is essential as air blocks ultrasound wave transmission. Use medical-grade ultrasound gel (not aloe vera gel or lotion) applied liberally to create a continuous layer without air bubbles. Water-based gels specifically formulated for ultrasound therapy provide optimal acoustic coupling and are available from medical supply retailers.
What conditions should never receive ultrasound therapy?
Never apply ultrasound over pregnant uterus, active cancers, pacemakers, thrombophlebitis, acute infections, or growth plates in children. Additional contraindications include working with eyes, heart, spinal cord after laminectomy, and areas with impaired sensation. Research demonstrates these contraindications are based on biological mechanisms of tissue heating and cavitation effects.
Should I use continuous or pulsed mode for home treatment?
Use pulsed mode (20-50 percent duty cycle) for acute inflammation and conditions where heat may worsen symptoms, and continuous mode for chronic conditions benefiting from tissue heating. Research shows pulsed mode produces primarily non-thermal mechanical effects while continuous mode generates thermal effects that increase tissue temperature by 1-4 degrees Celsius.
How do I know if the ultrasound therapy is working?
Effective treatment typically produces mild warmth in the treatment area (continuous mode) or no sensation (pulsed mode). You should not feel pain, excessive heat, or skin irritation. Clinical improvements usually appear after 3-6 treatment sessions over 2-3 weeks. If no improvement occurs after 8-10 sessions, consult a healthcare provider to reassess the diagnosis and treatment approach.
Can I use ultrasound therapy over metal implants?
Ultrasound can be used over stable internal fixation devices (plates, screws) with caution, but avoid newly placed implants (less than 6 months), joint replacements, and areas where metal lies superficially under skin. Research shows ultrasound energy reflects off metal surfaces potentially causing localized heating at bone-implant interfaces. When in doubt, consult with your surgeon before working with areas near metal implants.
What movement pattern should I use when applying ultrasound?
Move the sound head continuously in small overlapping circles or a figure-8 pattern at approximately 4 cm per second speed. Never hold the ultrasound stationary as this creates hot spots and potential tissue damage. Maintain constant contact with firm pressure sufficient to displace gel but not cause discomfort. The treatment area should be 2-3 times the size of the sound head effective radiating area.
Related Reading
- Best Therapeutic Ultrasound Machine for Home Use
- Cold Laser Therapy at Home: Complete Treatment Guide
- Best Cold Therapy Machine for Recovery
- Cold Compression Therapy Benefits: What Research Shows
- Cold Laser vs Red Light Therapy: Key Differences Explained
- Cold Laser Therapy for Pain Relief: Evidence-Based Guide
- Cold Therapy Machine for Knee Surgery Recovery
Recommended Products
Get Weekly Research Updates
New studies, updated reviews, and evidence-based health insights delivered to your inbox. Unsubscribe anytime.